
Rolling Drills to Develop Core Strength and Independence after Spinal Cord Injury
Turning in bed is one of the first skills occupational therapists teach newly injured SCI patients before leaving the hospital. The ability to roll over independently helps with:
Dressing
Changing position in the night
Avoiding pressure sores from staying in the same position for prolonged periods
Because this skill is high on the priority list before discharge, patients are often taught to use momentum to turn over: throwing the arms from side to side, and building rocking power to finally roll over.
While this strategy can “get the job done” and the skill can be checked off the to-do list for hospital discharge, this momentum strategy can be contraindicated for those with precautions against twisting the spine, and it is nearly impossible to do when wearing any type of cervical or thoracic spine brace. In addition, this strategy does not build core stability and trunk control after SCI in the most efficient way.
This article outlines three alternative ways to improve control and fluidity in rolling, or turning over in bed, and develop deeper core and trunk control after cervical or thoracic spinal cord injury.
What do rolling drills do beyond just help you learn to turn over?
Rolling drills should be practiced and further challenged beyond what is explained here, no matter what level of spinal cord injury or level of function. Rolling exercises offer widespread health benefits and support advanced movement goals such as crawling and walking.

Improve abdominal organ health and function
Human gait (with all its delicious micro spine rotations involved) naturally squeezes and massages our abdominal organs with every twist. Our organs - and their suspending ligaments - need this movement to stay hydrated and supple. Wheelchair users rarely get this spine rotation due to the bi-lateral nature of pushing a wheelchair, and even less so with spinal hardware, so should be implemented daily in therapy and workout routines.
Rolling exercises check this box to keep the organs hydrated and happy.

Develop mobility and full body integration/coordination for walking
If you took a birds-eye-view snapshot of someone mid-roll, you would see a shape that looks suspiciously similar to someone mid-stride, taking a walk! Rolling rolls, particularly these “X-Rolls” offer the shape of walking without needing the ability to stand through legs or hold hips.
With this experience, the spine can rotate and the hips can reciprocate in the same fashion as gait: developing the necessary flexibility in these joints for fluid gait mechanics.
Individuals looking to improve walking ease and coordination in walking should absolutely be incorporating rolling drills into the program!
Build independence in home workout routines
Outside of the functional benefit of being able to roll over in bed for night turning or dressing, being able to roll over opens the door for more independent home workout routines outside of the wheelchair - on the floor! There are so many exercises that strengthen and integrate the body from your back, side or front - done with minimal to no help from a helper.
Rolling over between these positions improves the efficiency of these sessions so you’re spending less time getting into position and more time DOING.

Rolling IS an exercise itself, not an in-between-exercise annoyance.
Rolling over onto your stomach can seem like an in-between exercise transition, however, I encourage you to think of this maneuver as its own exercise! Every time you encounter the need for this transition, work in a few reps of “rolling over” (or a drill of your choosing from below) to maintain or improve your efficiency.
Rolling after SCI = leveraging Fascial Lines
I would be doing you a disservice feeding you rolls for rolling without first sharing how several fascial lines are involved in this maneuver. As most individuals with SCI have full or partial paralysis of the abdominal/core muscles, it’s important to leverage these chains of connective tissue to transmit force and create fluid movement.
Fascial lines are chains of connective tissue that group muscles together based on their whole-body action.
For example, the muscles responsible for bringing the body into a flexed position (including a chin tuck), like Spine Stretch Forward or a Forward Fold are part of the Superficial Front Line. This includes the rectus femoris (your “6-pack abdominal muscle”), quadriceps and muscles that lift your head off the mat.
Muscles involved in rotation are filed into two partnered fascial lines: the Spiral Line and the Functional Line. These lines work together, in balanced opposition, to create rotation and stabilize against rotation. You can see how this pair is important to connect into when developing rolling skills!

Individuals with paralyzed core muscles can leverage these fascial lines because they are not innervated by nerves or the spinal cord!
They activate through stretch - and activation of muscles anywhere in the line. So, you can access your oblique abdominals through your armpit muscles (serratus anterior)! Because these lines are quite picky, you’ll want to pay attention to your head position and how your arm is moving during the following rolling drills. I’ll outline those specifics after all drills are explained.

Rolling supine (lying on back) to side, or into prone (onto tummy) after SCI
Starting flat can make you feel like a turtle flailing its arms, stuck on its back - especially if you have high tone or tightness in your spine that prevents you from rotating.
Instead of starting flat, “reverse engineer” the movement by starting on your side and controlling the roll back to flat.
Drill #1: Barrel rolls
Practice rolling from BACK to SIDE
Set-up:
Lie on the side.
Bend the knees up into the fetal position.
Place a long pillow or yoga bolster behind the hips and spine.
Execution:
Roll back to the pillow placed behind.
Try to roll with hips and shoulders together.
Move the pillow back an inch at a time to find your “Goldilocks Zone” of challenge and success.

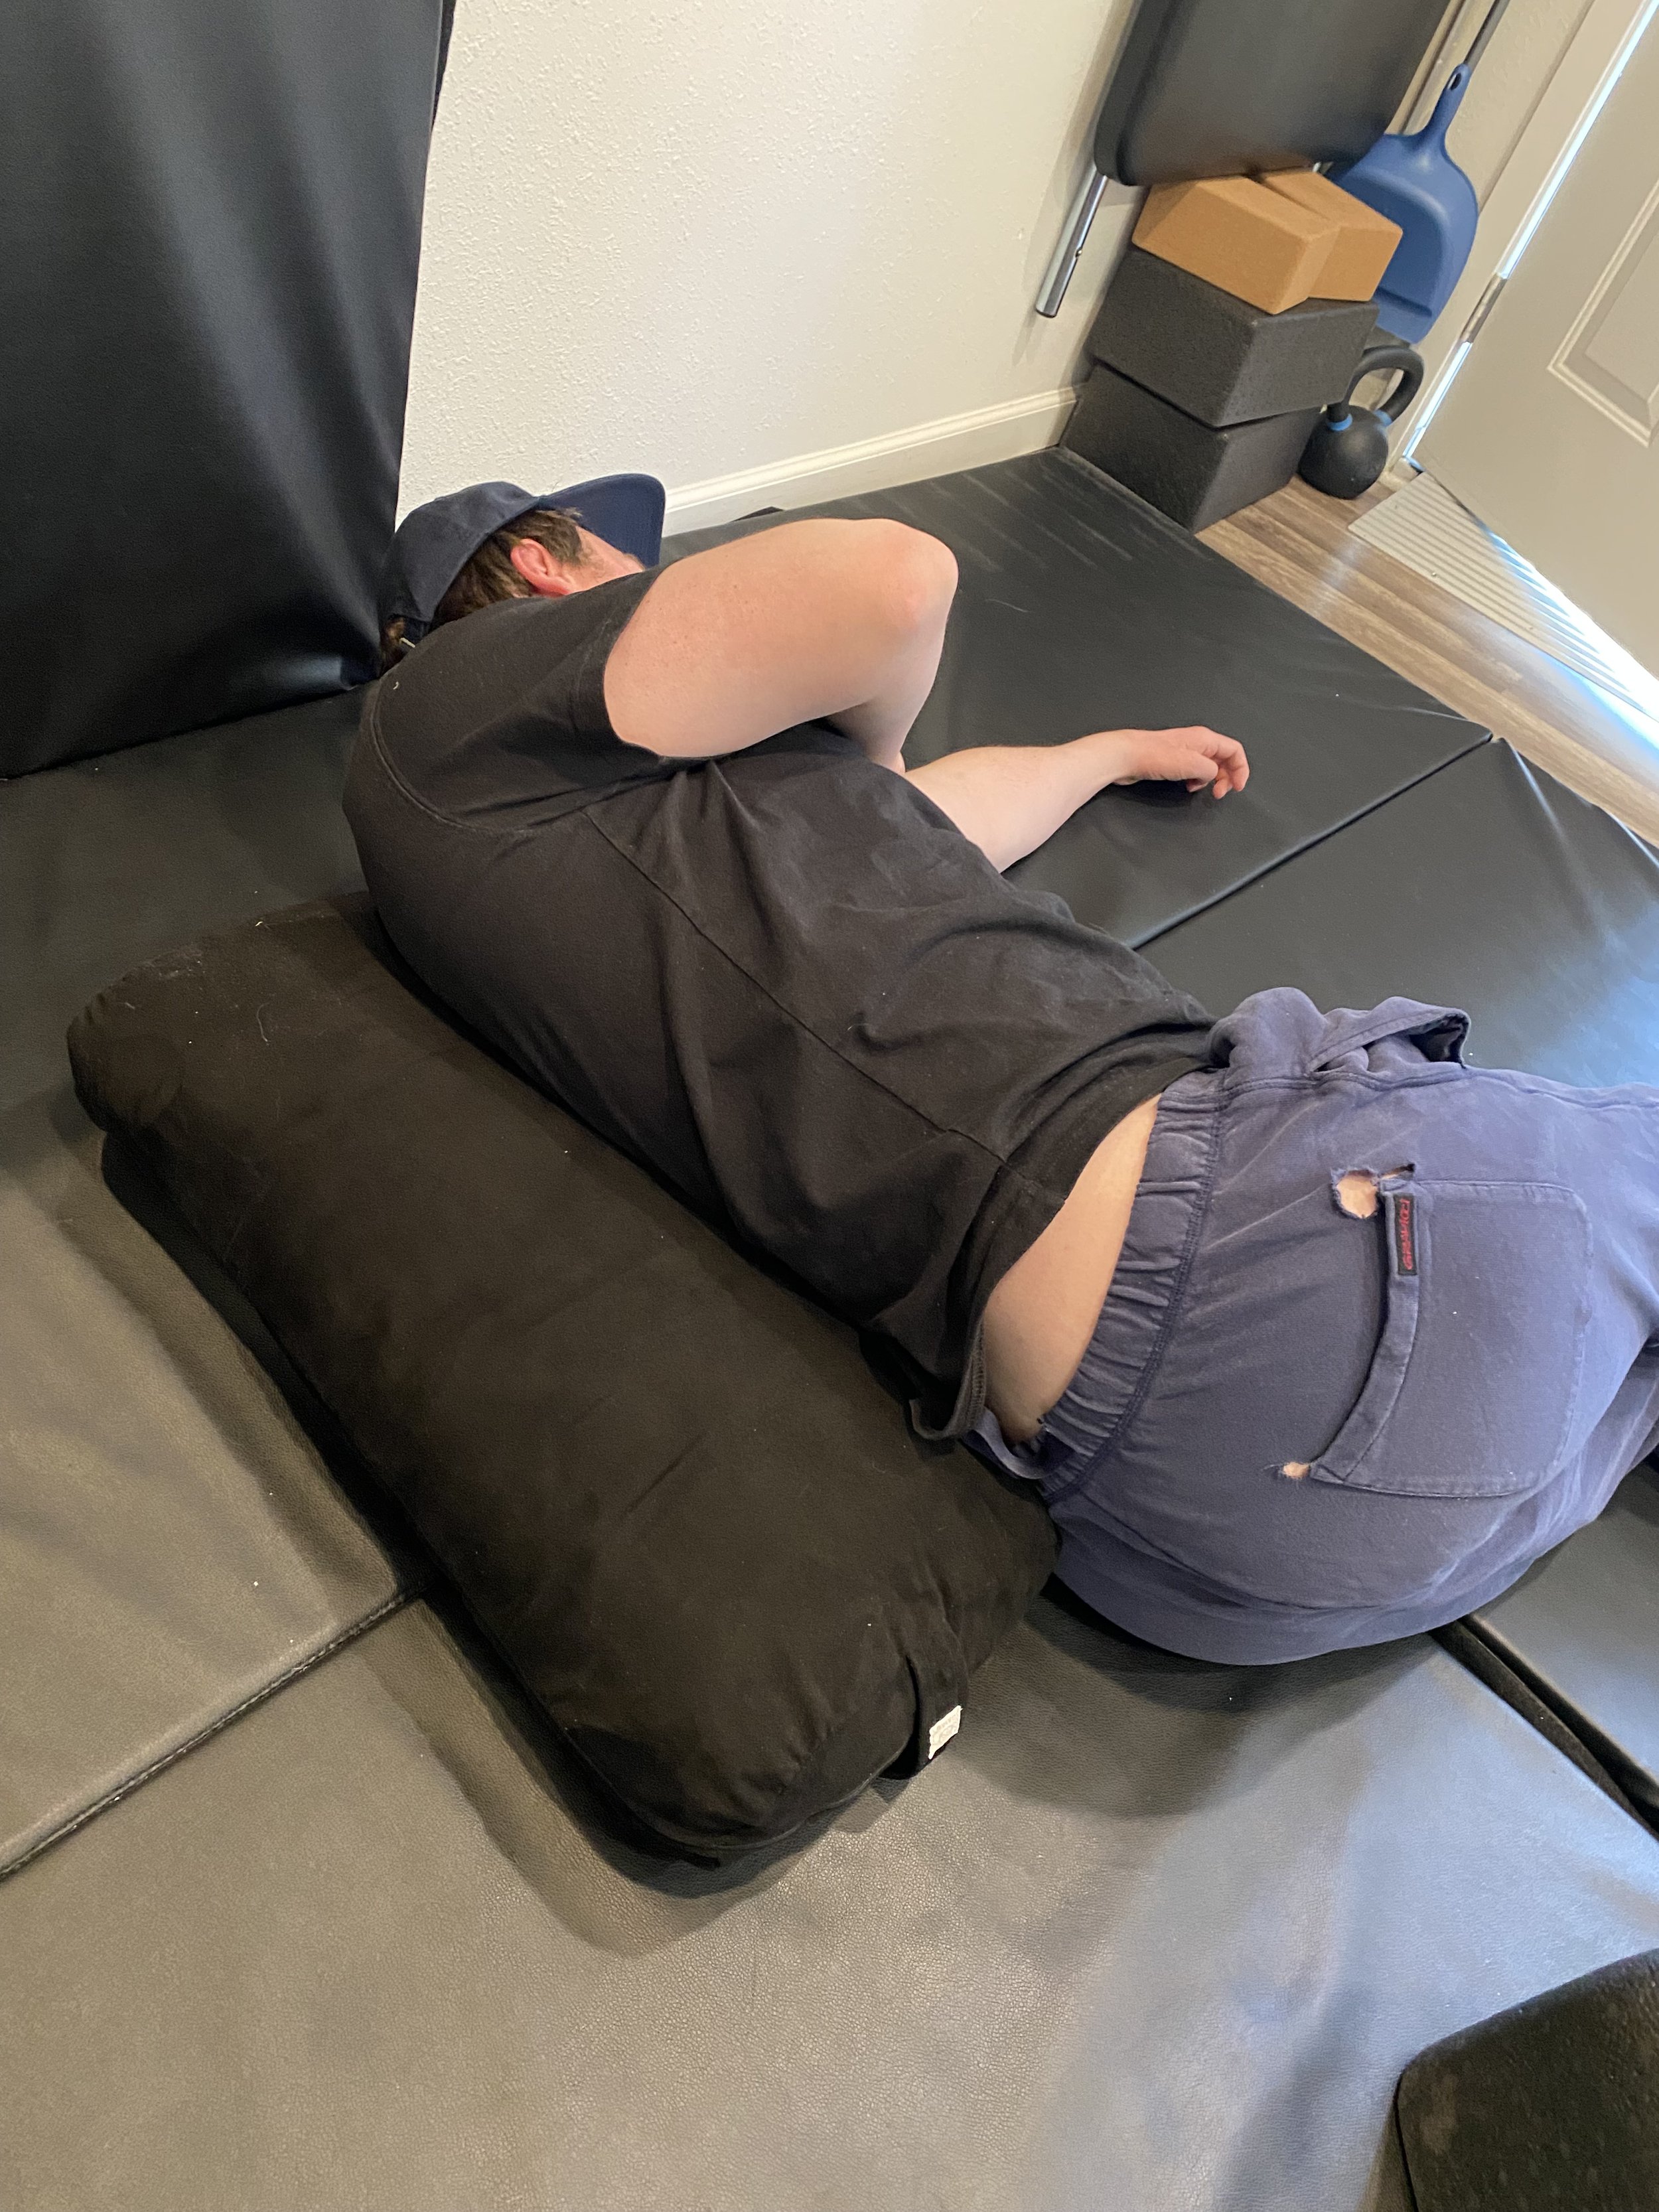
Drill #2: Pinwheel
Practice rolling from BACK to SIDE
Set-up:
Lie on side.
Bend knees up into fetal position.
Place squish ball or pillow behind hips only.
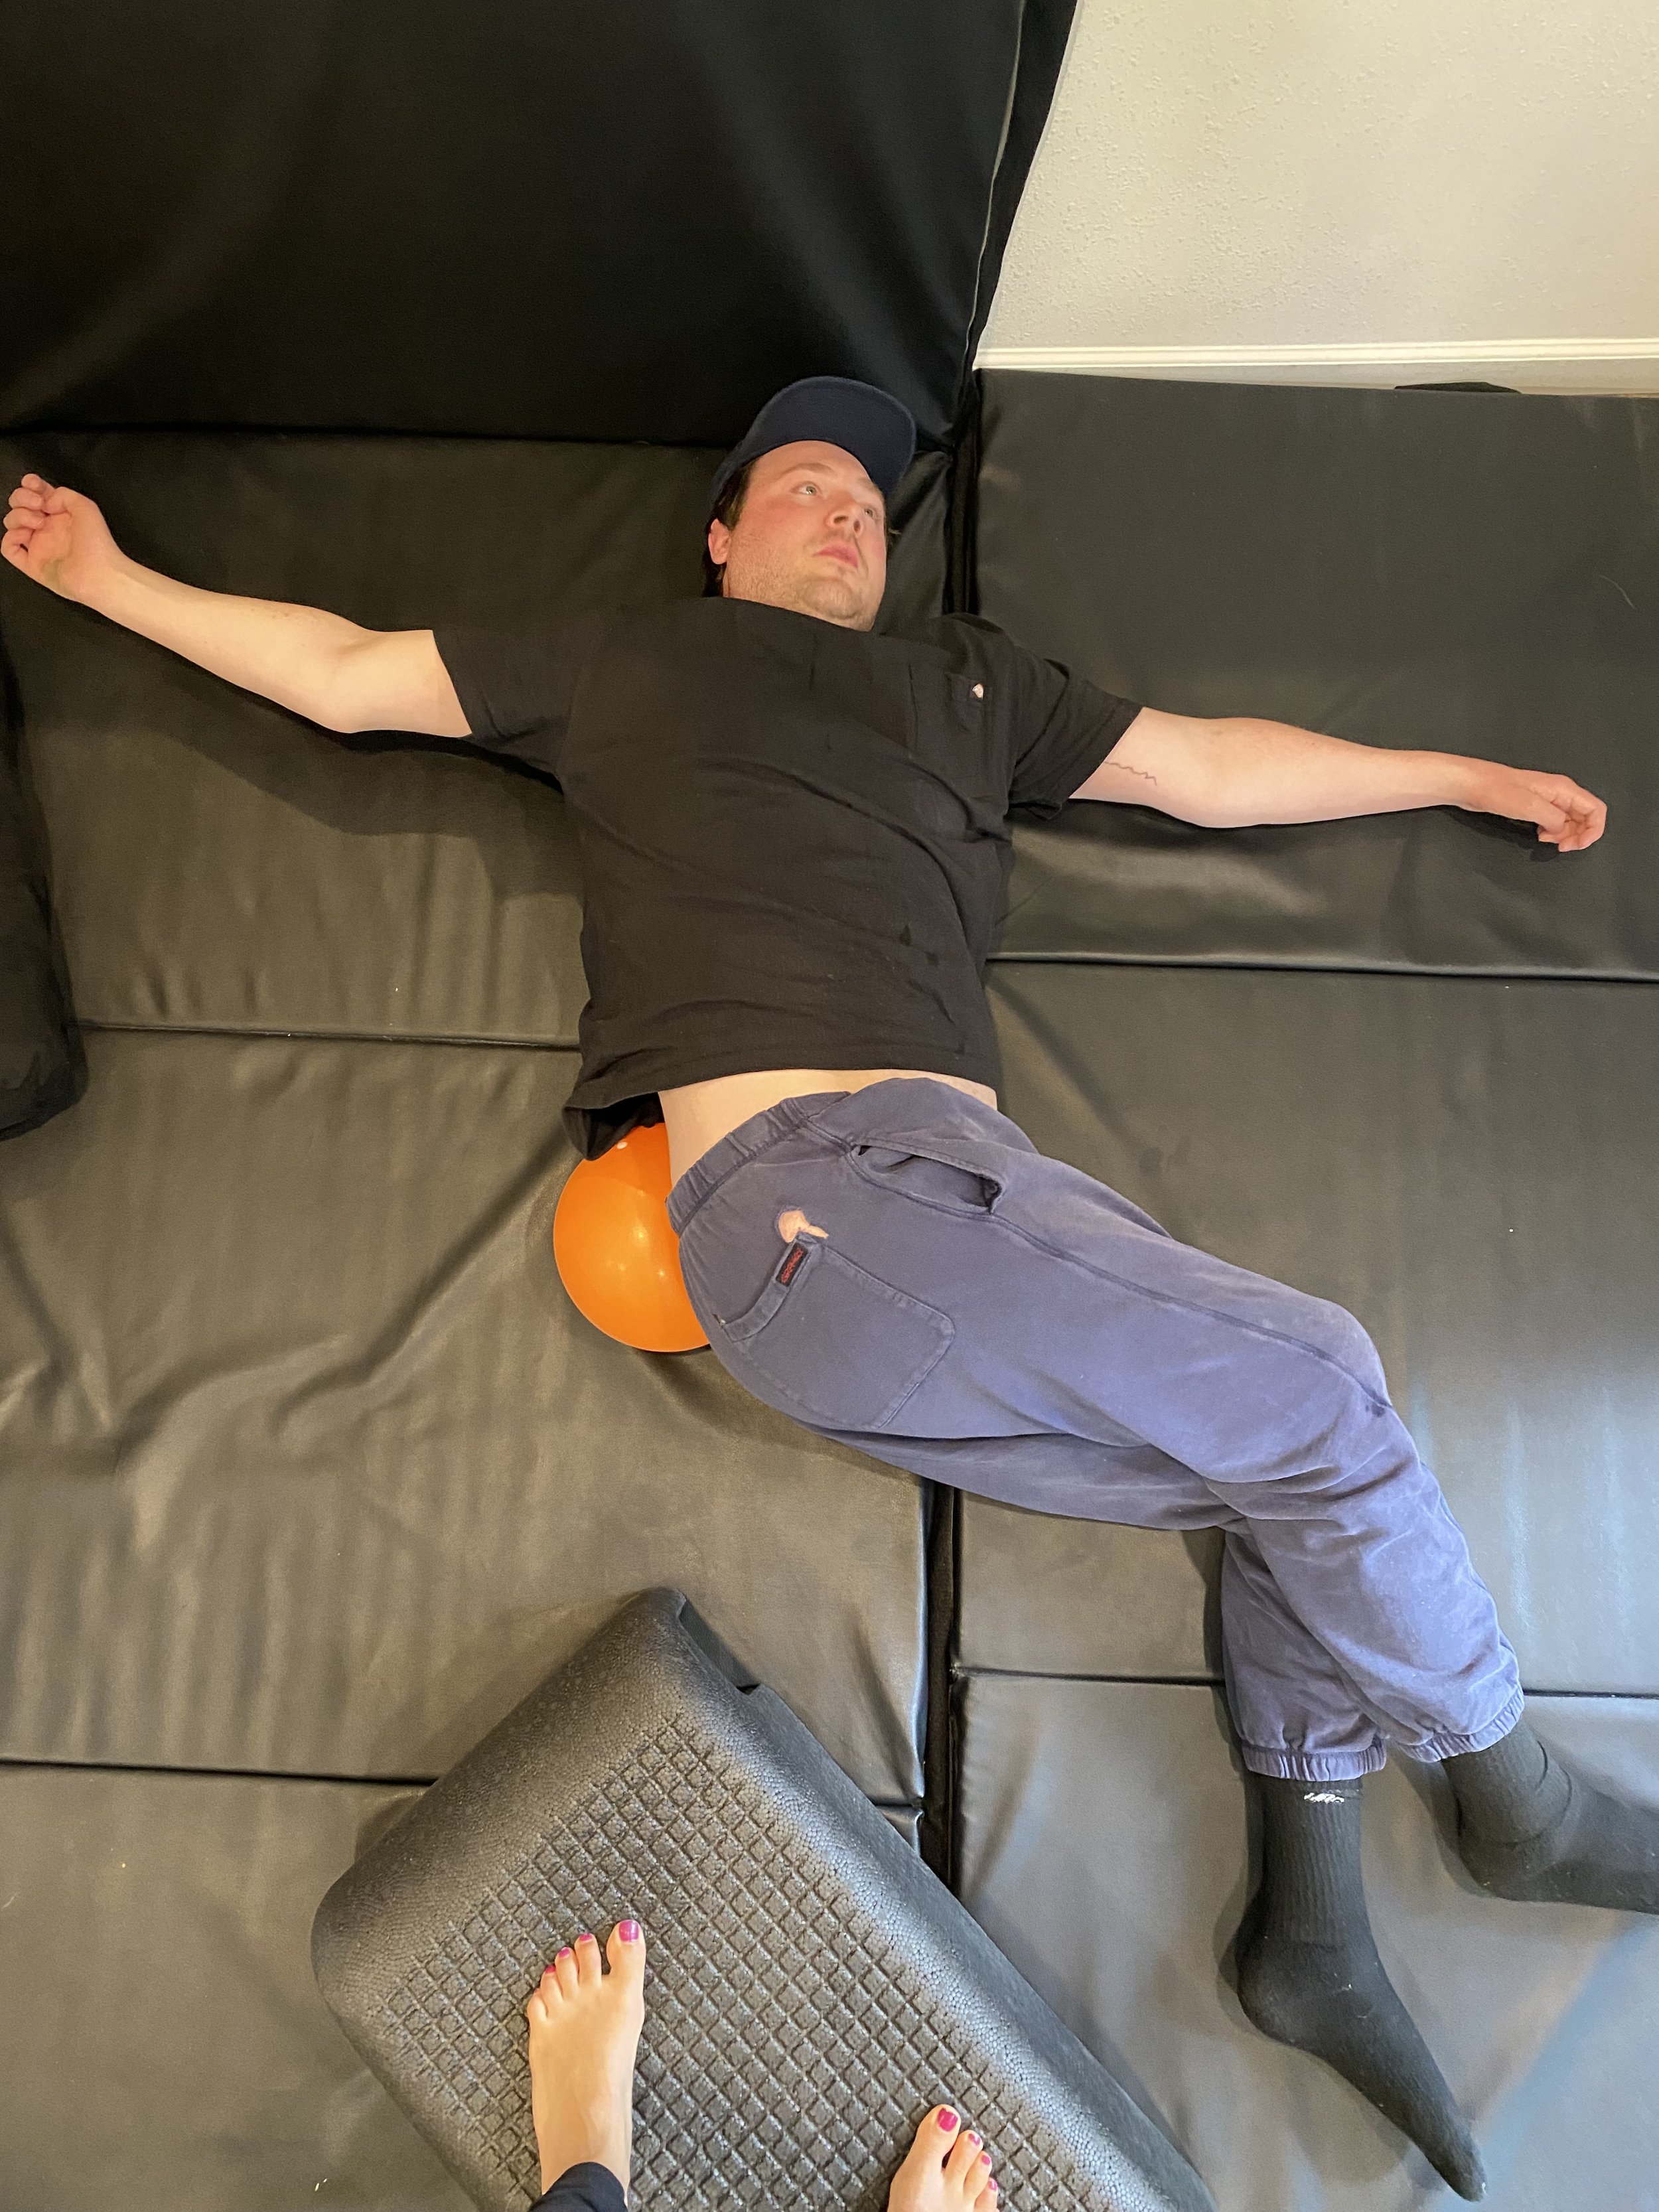
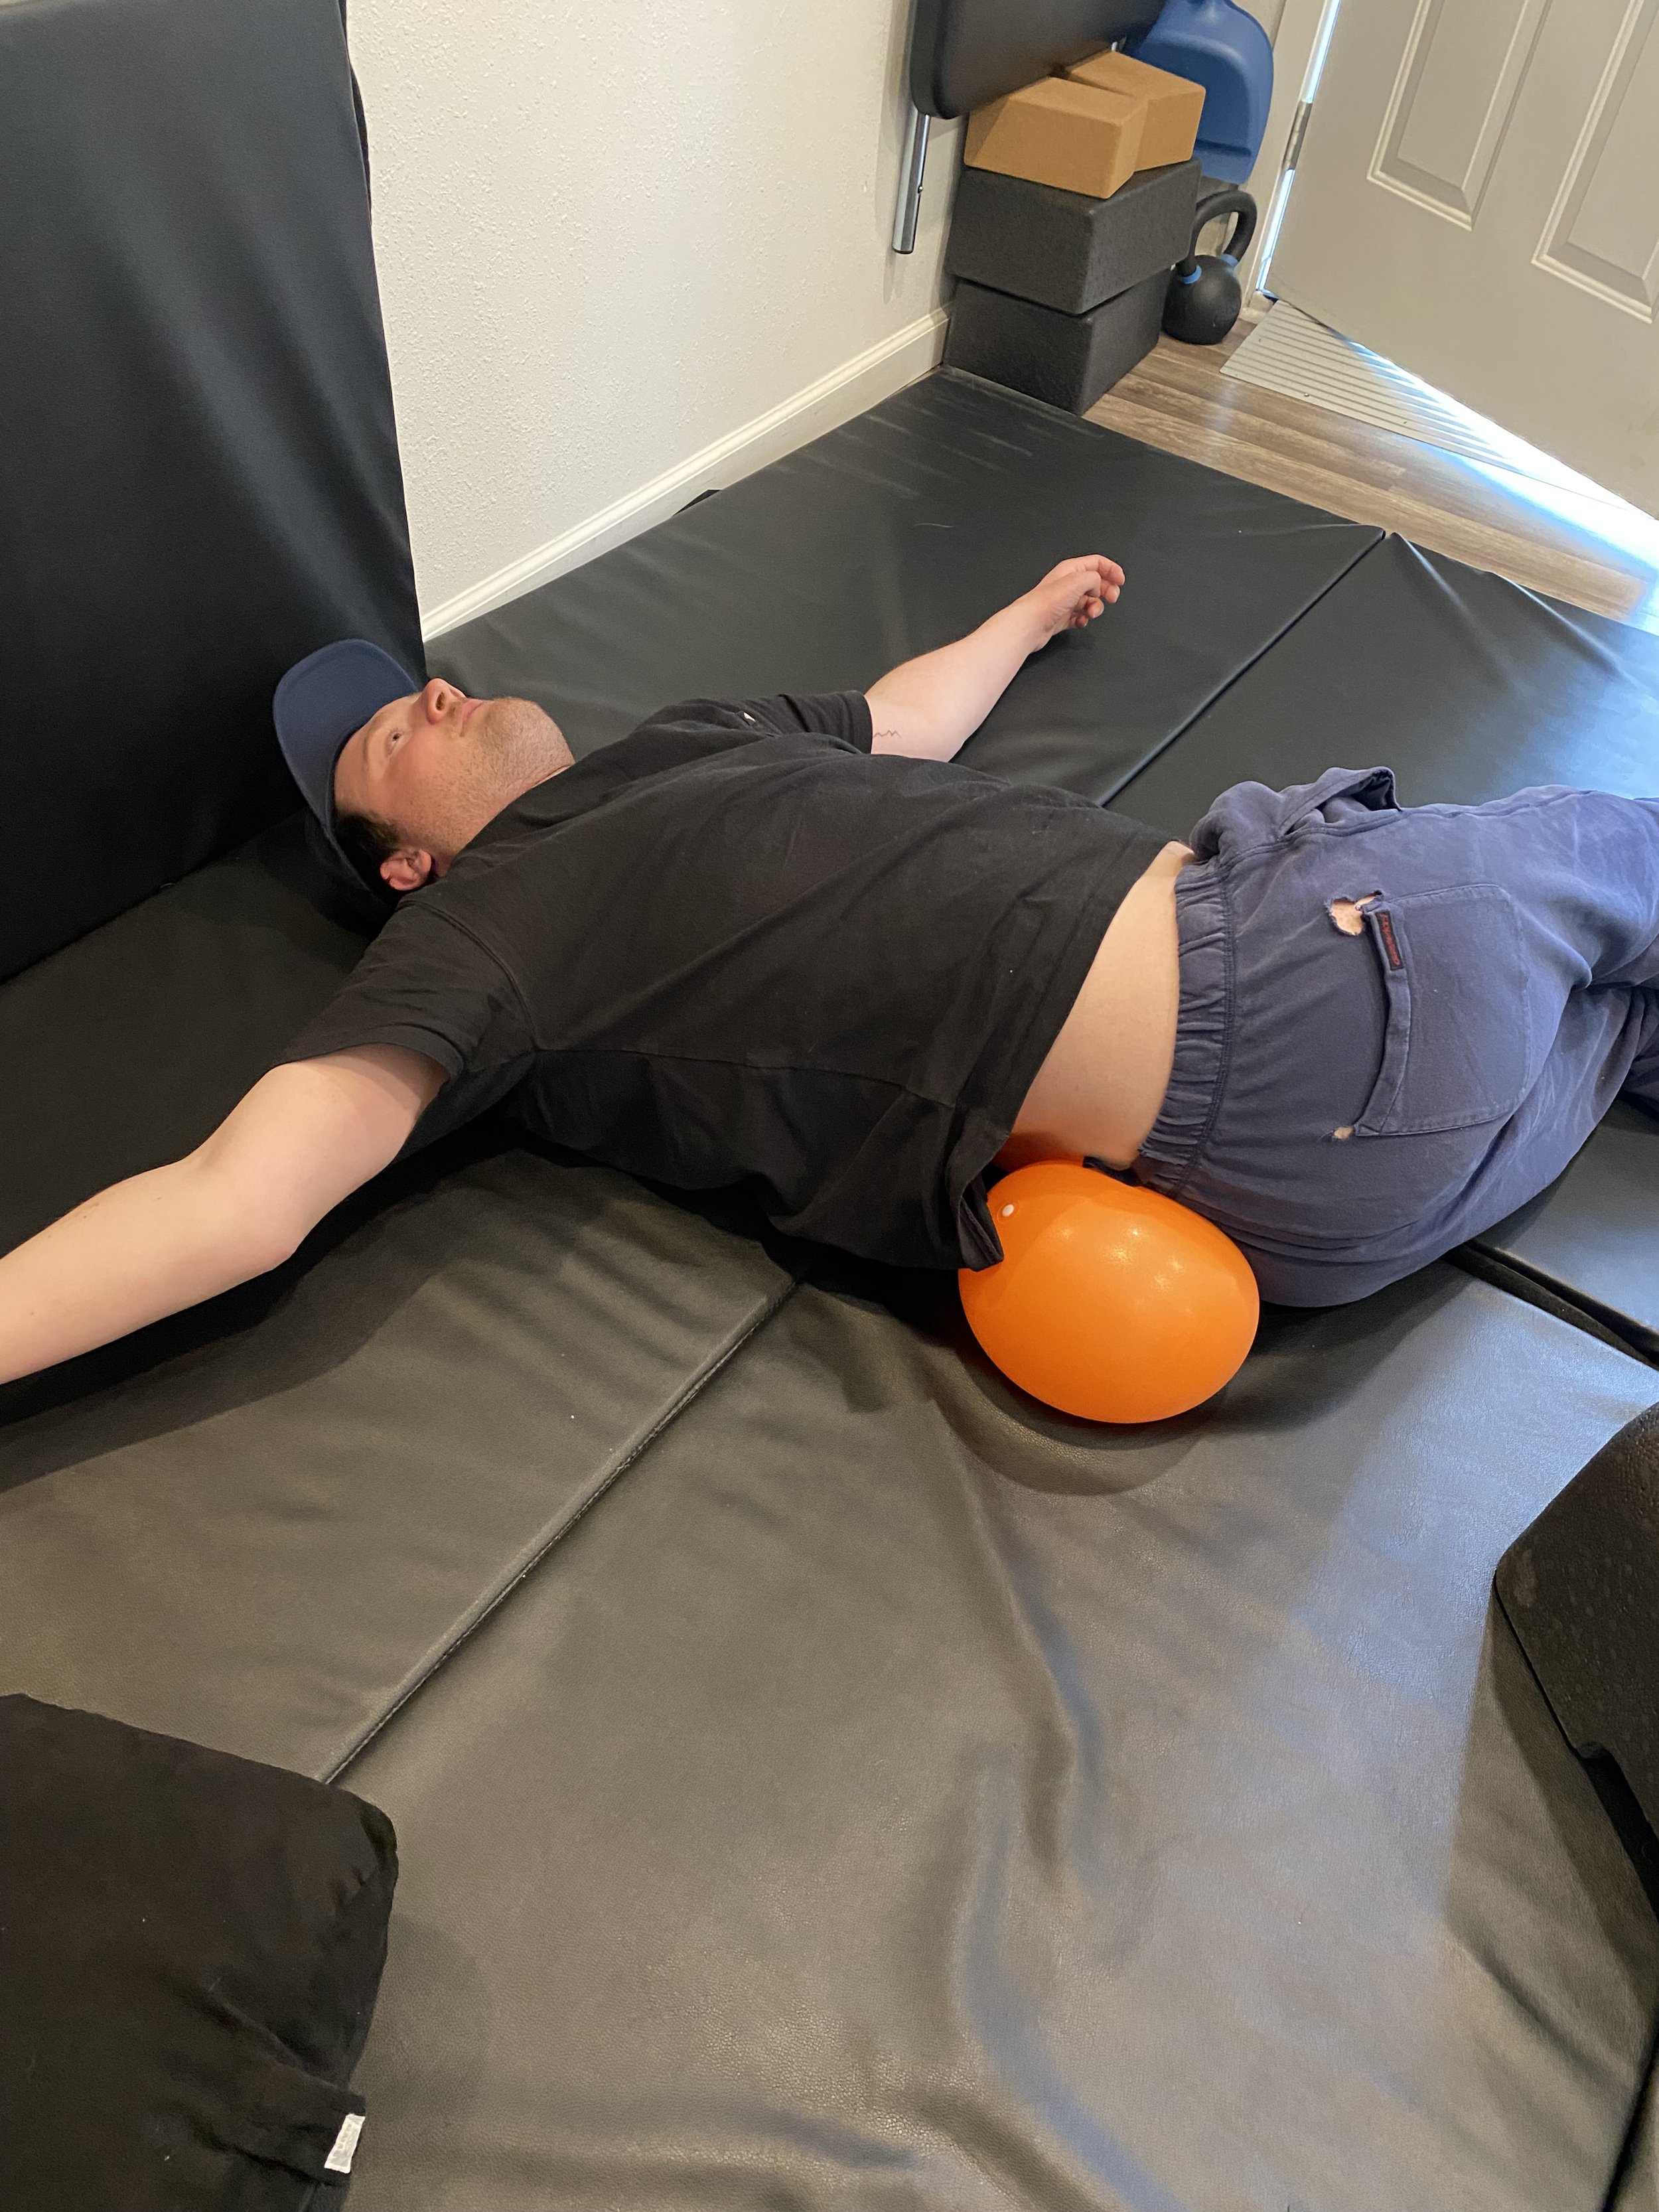
Execution:
**The hips should be supported/locked in place by the ball behind.
Roll torso back so the chest opens up (not just the arm going back) towards the ceiling.
Lift head and sweep arm low towards hips to return to the starting position on side.
Increase the challenge by pulling the ball back an inch and allowing the hips to fall back with the torso.
Drill #3: Side Hip slides
Practice rolling from FRONT (prone) to SIDE
Set-up:
Lie on side with the bottom leg straight down and the top knee bent up.
Place a squish ball under the top knee with something to block the foot from sliding down (use a weight, someone else’s foot, wall, etc.)
Execution:
Roll the hips and torso forward (as if to roll onto the stomach). The squish ball provides a “frictionless” surface to glide and rotate the hips.
Emphasize the push from the top arm.
**Keep chin tucked to activate the abdominals via the Front Line (fascial line)

BONUS DRILL: Rolling like a ball
Also known as "‘Egg Roll”
Set-up:
Hold both legs behind knees, or using thigh straps.
Place pillows on either side to create “bumper rails” as needed.
Execution:
Rock legs side to side until you start rolling to your side.
Pull legs across the body to roll back.
Lift head off the mat for extra core activation.
Be playful - have fun!

Key elements for these drills
Lift head/tuck chin throughout the movement to activate the abdominals via the Superficial Front Line (fascial lines by Anatomy Trains).
Sweep the arm low by hips (as opposed to overhead or straight across body) to activate the oblique abdominals via the Spiral Line (fascial lines by Anatomy Trains).
Press through BOTTOM arm/armpit to leverage a press off the floor/mat. This also activates the latissimus dorsi (‘lats’) of the Functional Line (fascial lines by Anatomy Trains).

Key elements in successful execution
Troubleshooting Tips
If your still having a hard time getting yourself started, or you’re getting stuck somewhere along the way, try these troubleshooting tips to help you get the ball rolling:
If the hips feel “heavy” or “dragging down”: Cross one leg over the other ankle or knee to give the lower body and hips a “head start” in the movement.
If you have a hard time breaking back tone and/or getting rotation: Start in a little bit of side bending (‘banana shape’) to break the back tone and jump start your rotation.
If you have a hard time getting started at all: Have a helper give you nudge/small lift from underneath the leading shoulder. This can get you into a position where you can engage your neck muscles (sternocleidomastoid) to lift your head.
Leverage the line: have your helper apply some pressure/traction using the heel of their hand on your stomach, starting just below the base of the sternum traveling towards the bottom hip. This tractions/cues the Spiral Line.
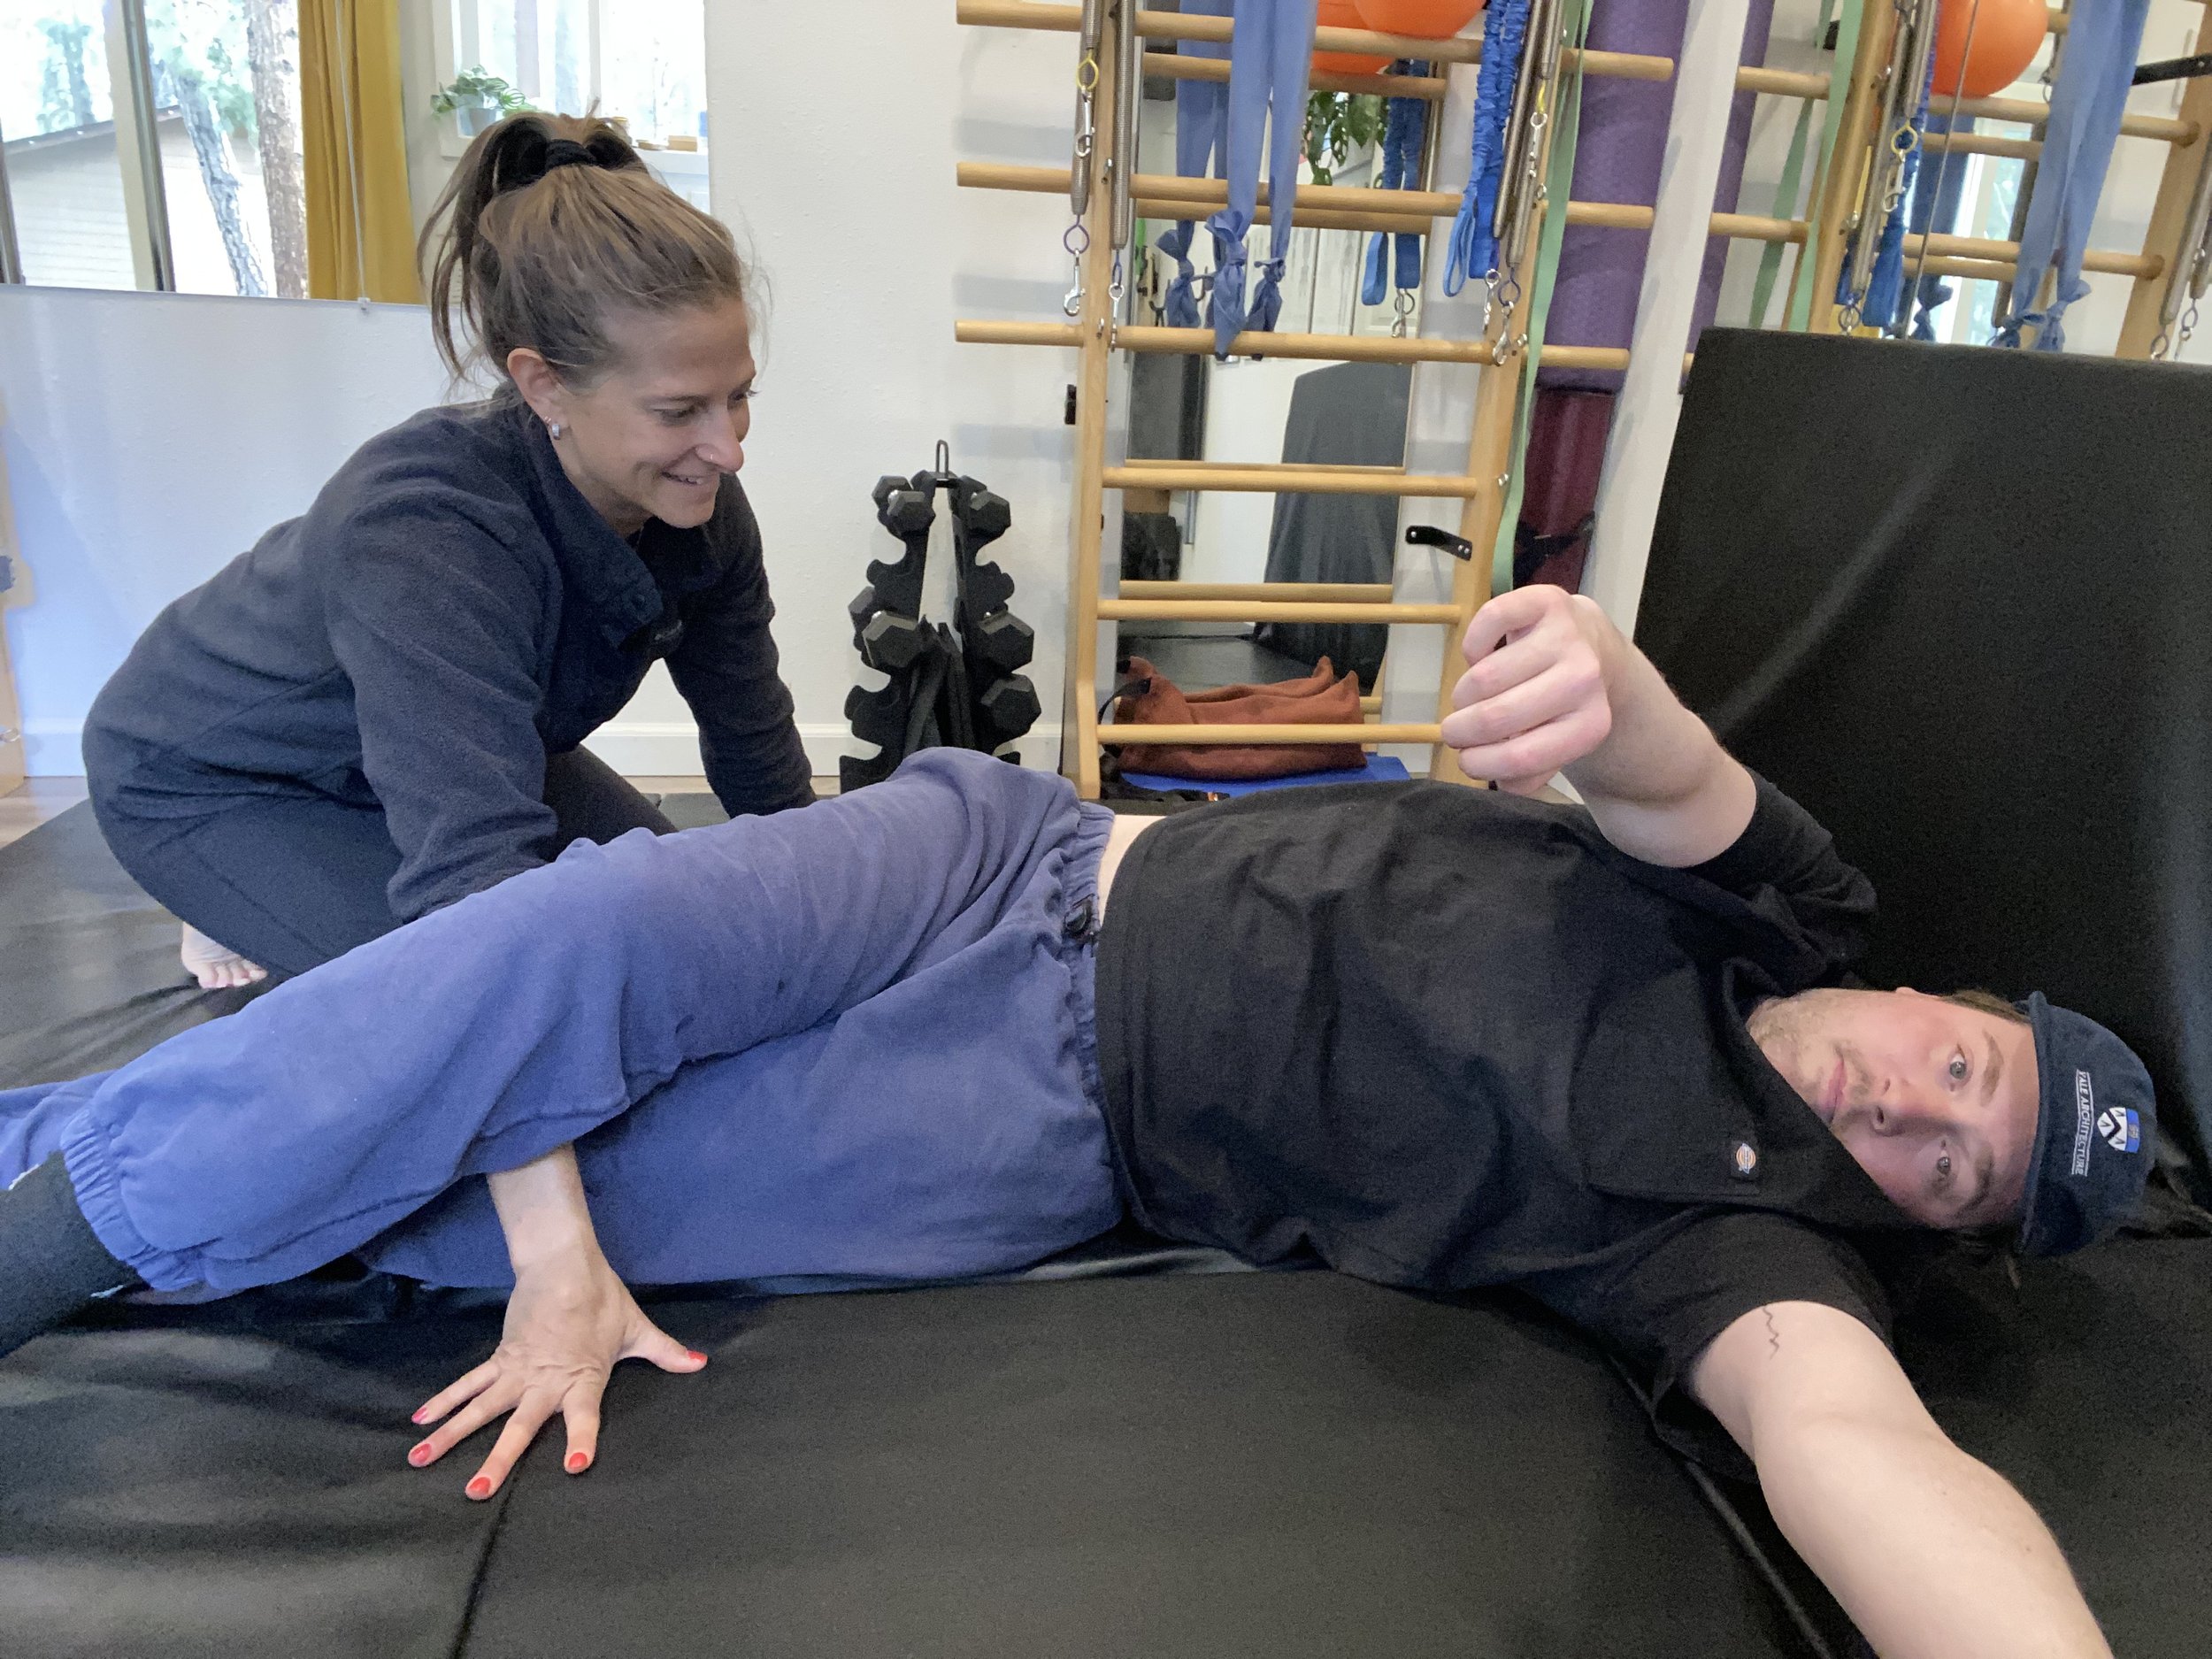
Helper spotting: cross legs and put arm between the thighs & onto the floor. Rock with your body, nudging the hips over.

Old habits die hard
If you have used the “swing the arms as hard as you can” strategy for a while now, learning a new movement pattern for something that should be accessible to you can be frustrating. Remember that while that strategy will get you there in a pinch, these new drills will help you build core strength for deeper control and support your spinal joints in the process.
I often see clients revert to old habits when they get frustrated (understandably!). Either stay accountable to yourself or have your helper look out for:
❌ Pulling on the edge of mat/table or reaching for a strap or hand to pull over: this is the complete opposite movement pattern that you are trying to learn! The Spiral Line activates through a PUSH or REACH.
❌ Dropping head drop back/pushing through head on the mat: this cues for BACK line activation (again, opposite pattern) and dis-engages the Front Line (abdominals). If getting stuck to the the point of eliciting this survival pattern, use one of the troubleshooting tips from above.
Putting it all together
After working on the drills above for competency (days, weeks, months?), try rolling from an almost flat position. Don’t forget to lift you head up/tuck your chin!
Rolling is an important skill that should be worked on at all stages of recovery after SCI.
Interested in more 1:1 guidance in your SCI recovery and wellness journey?
Find remote & in-person SCI coaches through our professional network.
About the Author of this Blog:

Stephanie Comella has been working with individuals with spinal cord injuries since 2011. She blends her formal education in movement science, Pilates, and other mindful movement modalities with neurological science to provide an intuitive, hands-on style of teaching focused on body re-connection. Stephanie aims to empower both individuals with SCI and their trainers using a human-powered healing approach.